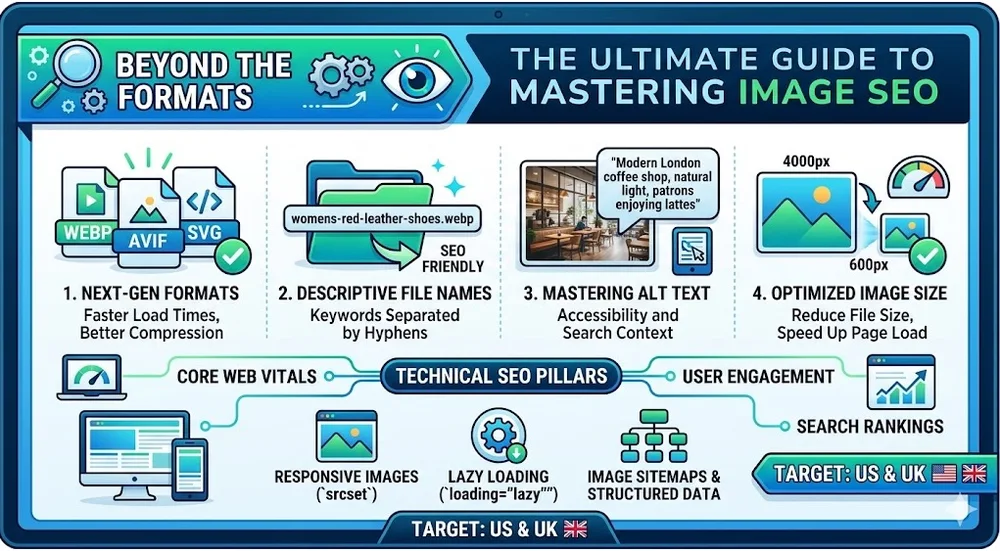
For years, search engine optimization strategies have heavily prioritized text. Content is king, after all. But in today’s visually driven digital landscape—and with Google’s relentless focus on page experience—treating images as a mere afterthought is a critical mistake.
Whether you are targeting consumers in the US, the UK, or globally, image optimization is no longer just about getting your pictures to show up in Google Images. It is a foundational pillar of technical SEO, directly impacting your Core Web Vitals, user engagement, and ultimately, your organic rankings.
Here is the professional’s playbook for turning your visual assets into powerful search engines drivers.
1. Choose the Right Next-Gen Format
If you are still uploading heavy PNGs and JPEGs for every graphic on your site, you are leaving site speed on the table. Search engines reward fast-loading pages, and images are usually the largest contributors to page weight.
- WebP: This should be your go-to standard. Developed by Google, WebP provides superior lossless and lossy compression. It can be up to 30% smaller than comparable JPEGs without sacrificing quality.
- AVIF: The new kid on the block, AVIF offers even better compression than WebP. While browser support is still catching up compared to WebP, it is highly recommended for future-proofing your site.
- SVG: Perfect for logos, icons, and simple illustrations. Because they are vector-based, SVGs scale infinitely without losing quality or inflating file size.
- JPEG/PNG: Keep JPEGs for complex photographs when WebP isn’t an option, and reserve PNGs strictly for images requiring a transparent background.
Pro Tip: Always serve next-gen formats while keeping traditional formats (like JPEG) as a fallback for older browsers using the
<picture>HTML element.
2. File Names: Speak the Crawler’s Language
Before a search engine bot even looks at your page code, it reads the file name. Uploading IMG_9845.jpg gives search engines zero context.
Rename your files to be descriptive, keyword-rich, and separated by hyphens (not underscores) before uploading them to your CMS.
Bad: red-shoes-final-v2.jpg
Good: womens-red-leather-running-shoes.webp
3. Master the Art of Alt Text
Alternative (Alt) text serves two critical purposes: it ensures your website is accessible to visually impaired users using screen readers (a legal requirement in many US and UK jurisdictions), and it acts as the primary anchor text for image search.
How to write perfect alt text:
- Be descriptive: Imagine describing the image to someone over the phone.
- Keep it concise: Aim for under 125 characters.
- Naturally weave in keywords: Avoid keyword stuffing at all costs. If the keyword fits naturally into the description, use it; if not, leave it out.
Example Scenario: A photo of a modern coffee shop in London.
- Poor:
coffee shop cafe latte espresso london - Excellent:
Patrons enjoying lattes inside a modern, naturally lit coffee shop in Covent Garden, London.
4. Compress and Resize Before Uploading
You do not need a 4000-pixel wide image to display a 600-pixel wide blog post header. Serving oversized images forces the user’s browser to download the massive file and then shrink it via CSS—a massive drain on your Largest Contentful Paint (LCP) metric.
- Resize: Determine the maximum display width of your website’s container and resize your images to match that exact dimension.
- Compress: Use tools like TinyPNG, ImageOptim, or server-side plugins (like Smush for WordPress) to strip unnecessary metadata and compress the file size without visible quality loss. Aim for under 100KB for standard images.
5. Implement Responsive Images and Lazy Loading
Your users are browsing on everything from 4K desktop monitors to 5-inch smartphone screens. Your images need to adapt.
- Responsive Images (
srcset): Use thesrcsetattribute in your HTML to provide the browser with a list of different image sizes. The browser will automatically choose and download the most appropriately sized image for the user’s device screen. - Lazy Loading: Implement native lazy loading (
loading="lazy") on all images below the fold. This tells the browser to defer loading those images until the user scrolls near them, drastically speeding up the initial page load time.
6. Leverage Image Sitemaps and Structured Data
Don’t wait for Google or Bing to stumble upon your images—hand them over on a silver platter.
- Image Sitemaps: If your site relies heavily on visual content (e.g., e-commerce stores, photography portfolios), create a dedicated image XML sitemap or ensure your images are properly integrated into your existing sitemap.
- Schema Markup: Use structured data (like Product, Recipe, or Article schema) and include the image property. This is what enables search engines to display rich snippets—such as an image next to a recipe or a product rating in the SERPs—dramatically increasing your click-through rates.
The Bottom Line
Image optimization is not a singular task; it is an ongoing workflow. By integrating these practices into your standard publishing process, you will build a website that is faster, more accessible, and heavily favored by search algorithms across the US, the UK, and beyond.
Leo Falsafi is a digital marketing veteran and senior journalist at Virlan.co, where he covers the intersection of digital marketing, gaming, and breaking US trending news. With nearly two decades of hands-on experience in SEO and digital strategy, Leo has consulted for and scaled hundreds of companies. His deep industry roots allow him to deliver sharp, fact-checked insights and analysis on the trends shaping today's digital landscape.